Creating a custom report
This article describes the custom organization backup reports you can create.
Summary report
In the Summary report, the Backups section includes information about the number of successful and failed backups. This information is represented graphically in the Hourly Events Summary section. You can hover over a bubble to display data specific to a backup.
In the Events By Day section, the Backups line chart provides a daily breakdown of the number of successful and unsuccessful backups. The Backup Items line chart provides the number of items that were successfully and unsuccessfully backed up per day. You can hover over a data point in a line chart to display the number of successful and unsuccessful backups for a given day.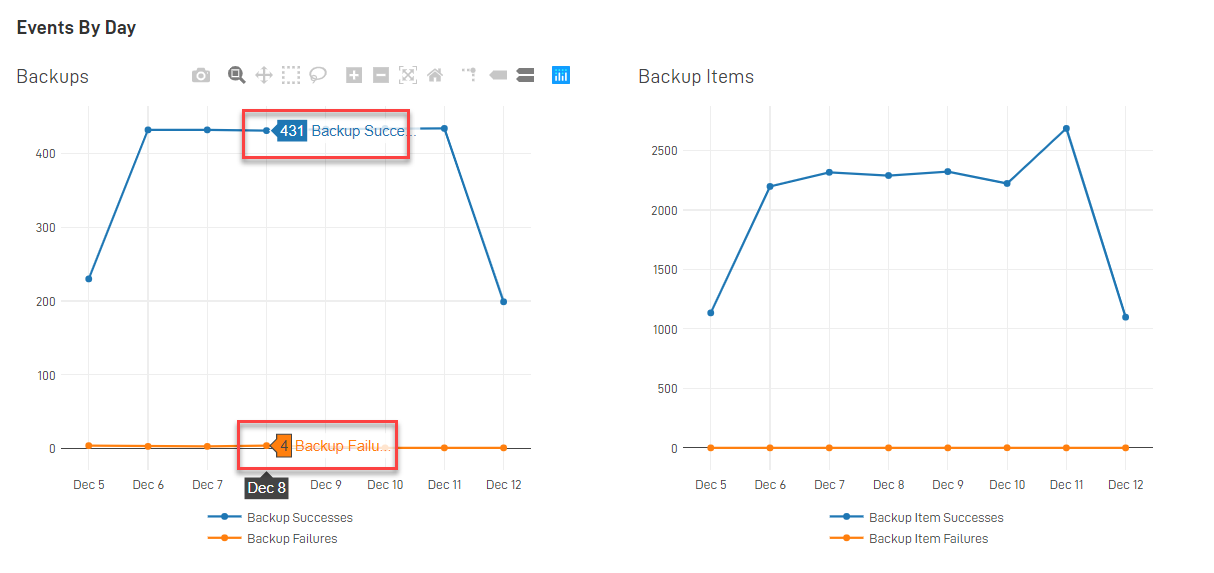
Event log
The Event log presents organization backup data in table format:
- Event: Identifies the specific event, as in Backup, Export, or Restore.
- Completed: Date and time the event was completed.
- Source: Specific seat for which the event applies.
- Destination: NA
- App: Service for which the event occurred.
- Recovery Point: Date and time the event was started.
- Performed By: NA
- Items: Number of successful items out of the total number of items for the event.
- Red X indicates the backup completely failed.
- Green circle means backup was 100% successful.
- Half-green and half-orange circle indicates the backup completed successfully but one or more items may be missing.
- Failure Reason: Description of why event failed.

To create a custom report:
- On the SaaS Protection Status page, click the desired organization.
- Select Admin > Reporting.
- In Event Class, select one of the following:
- System Events
- User Actions
- In the Date Range list, the last eight days are pre-selected. To select a different date range, select an item in the list.
NOTE The item All Time selects a range starting with the date the account was added through the current date. With the Custom Range item, you can specify a range by selecting start and end dates on the calendar.
NOTE If you selected User Actions in step 3, All is selected for the list values in steps 5 through 7 and cannot be changed.
- In the Event Type list, All is pre-selected. In the list, you can select Backup, Export, or Restore.
- In the Status list, All is pre-selected. In the list, you can select Success or Failure.
- In the Application list, All is pre-selected. In the list, you can select a specific application on which to base the report.
- In the User box, you can enter a user name. The report results will apply only to the user specified.
- To display the results in a summary report, click Generate Summary.

- To display the results in an event log, click View Event Log.
- To create a CSV file of the report, click Download CSV.


