How do I set up a new Backupify for Google Workspace account for my SaaS Protection trial?
Environment
- Backupify for Google Workspace
IMPORTANT If you are not starting a trial and have already purchased a standalone SaaS Protection subscription or a Kaseya 365 User subscription, see one of the following articles to get started with SaaS Protection: Standalone: Getting started with Datto SaaS Protection or Kaseya 365 User: Getting started with Datto SaaS Protection.
Install the Backupify app from the Google Workspace Store
Use this procedure to install the Backupify app:
-
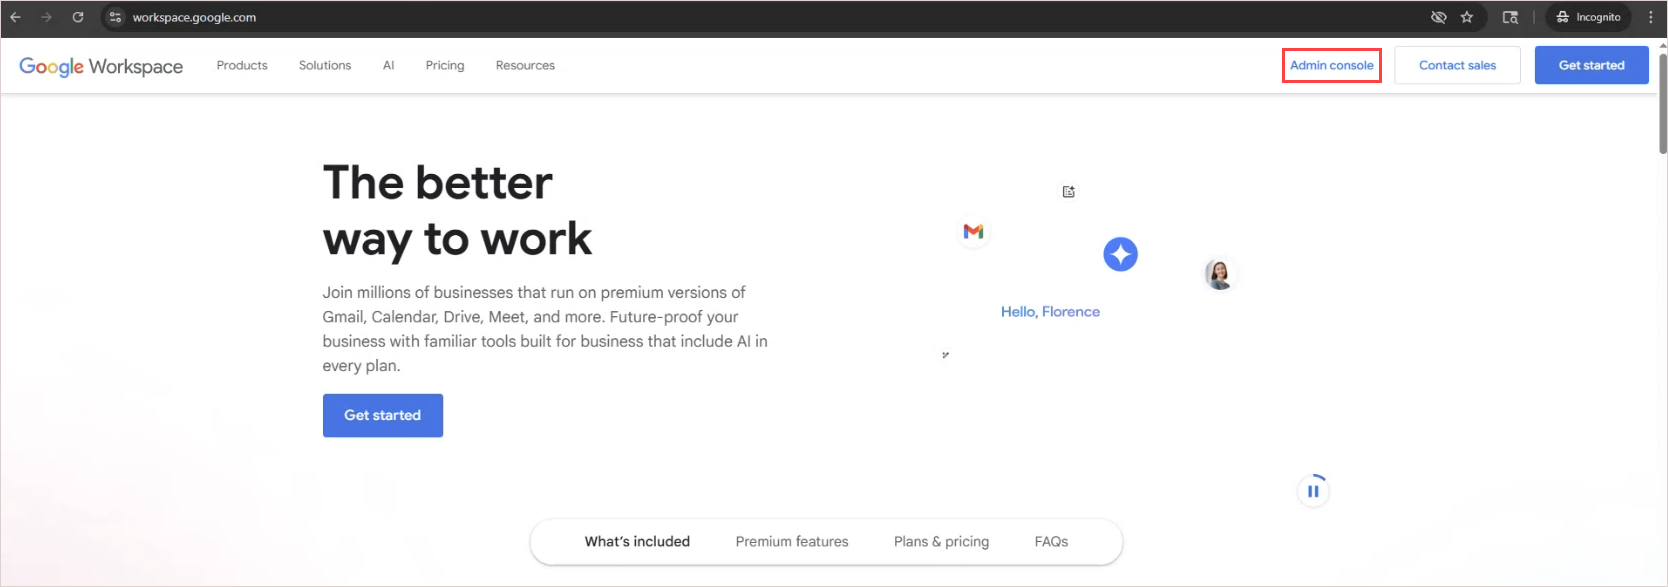
Open a private browser tab (e.g., a Google Incognito tab or a Microsoft Edge InPrivate tab).
-
Log in to Google Workspace as a super admin user (only super admins are able to install the Backupify app).
-
Click Admin Console.
-
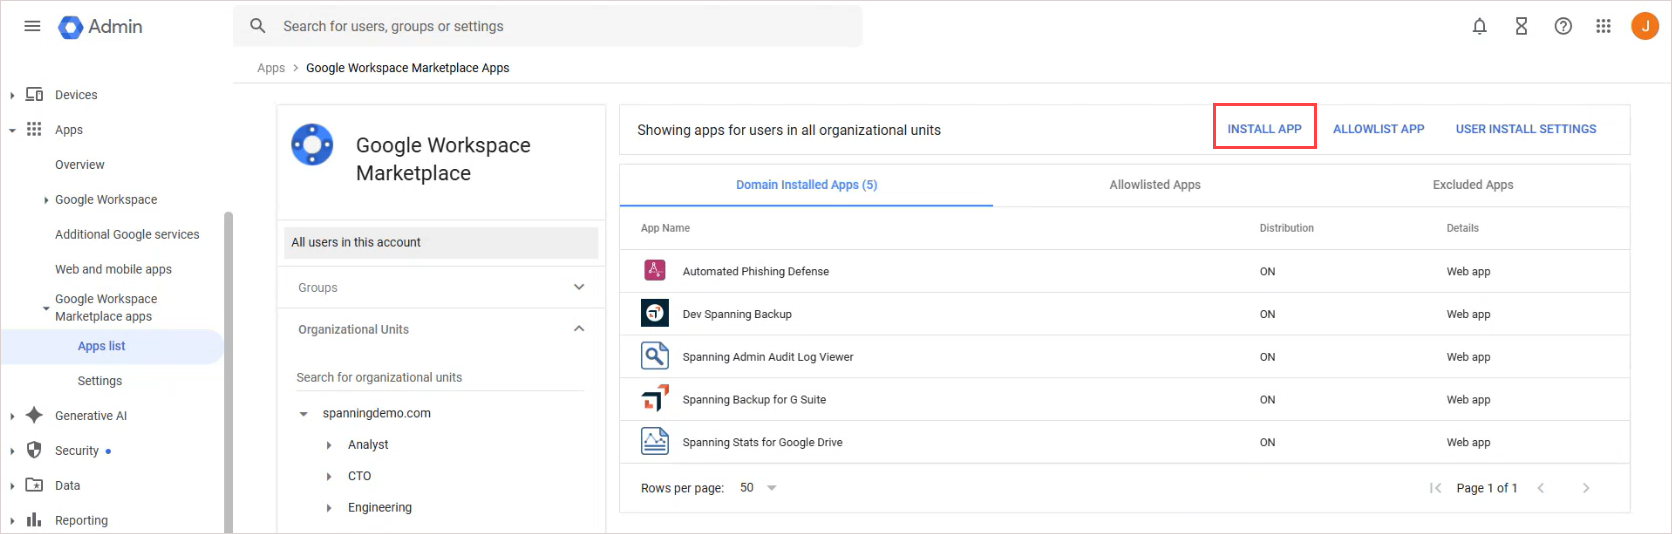
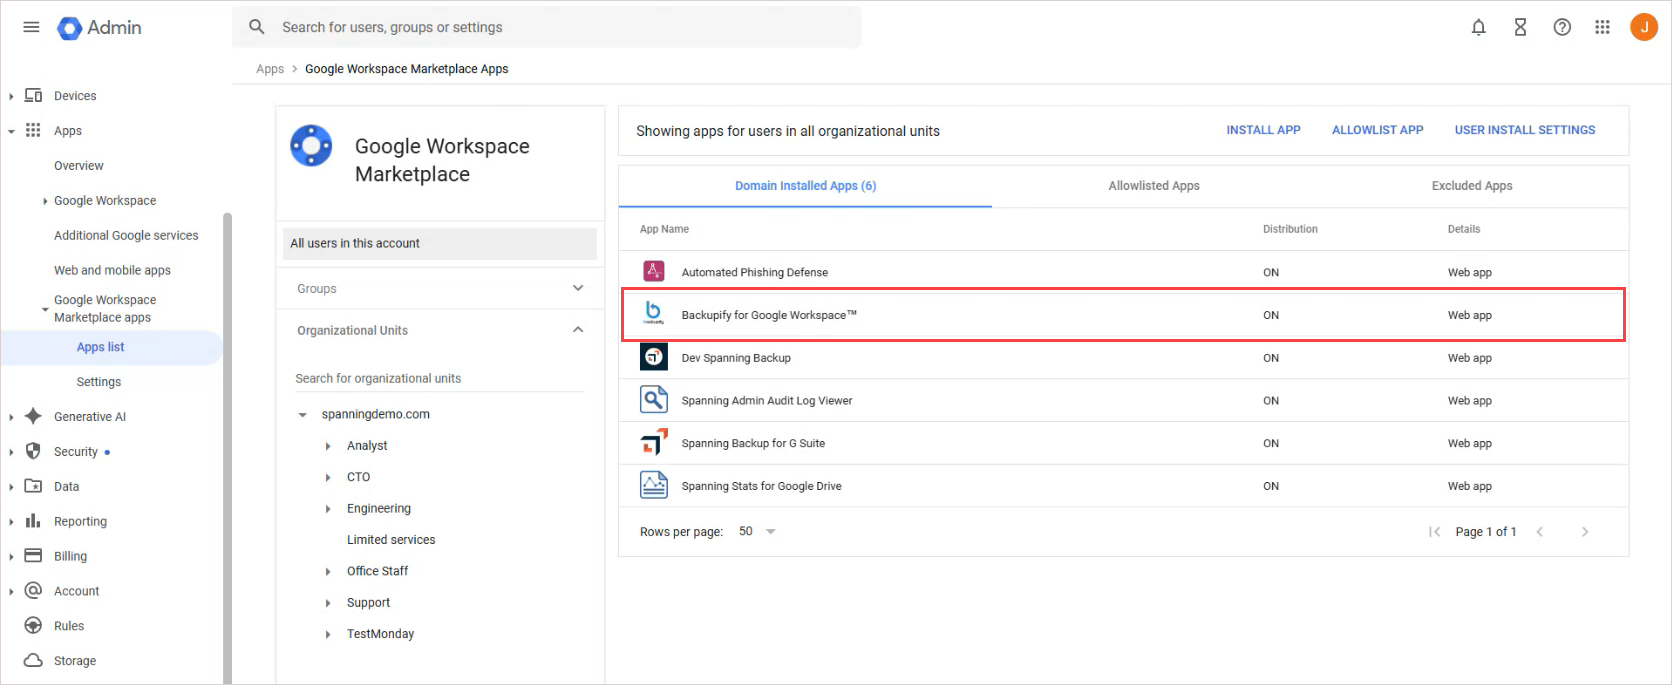
From the Google Workspace Admin Console, select Apps > Google Workspace Marketplace apps > Apps list.

-
In the upper-right corner, click Install App.
-
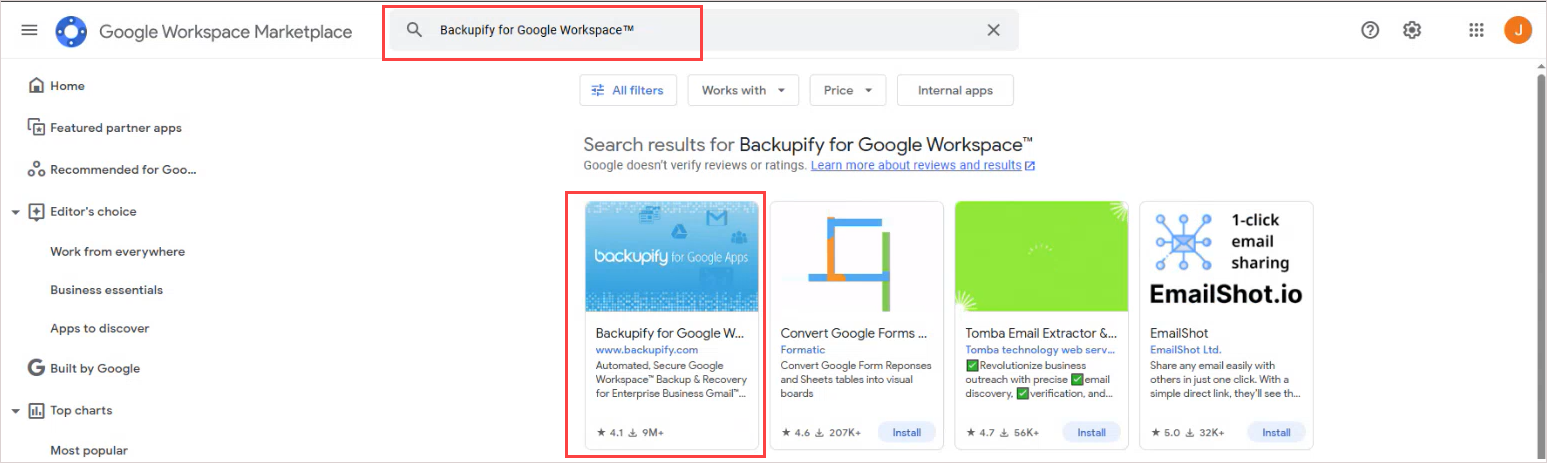
Search for Backupify for Google Workspace. In the results, select the app.
-
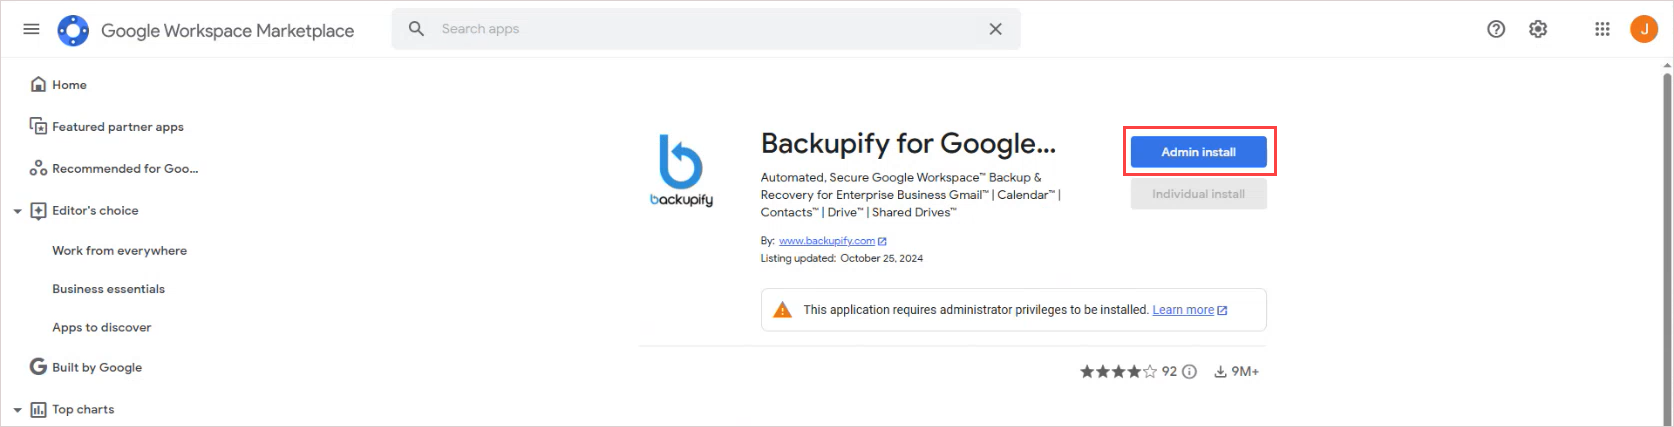
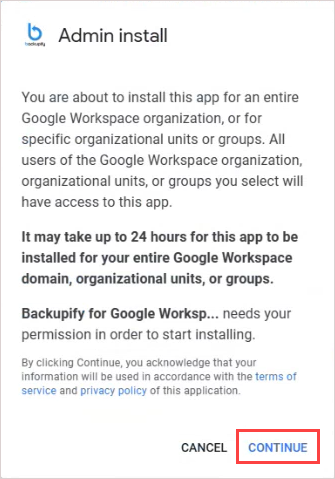
Click Admin Install.
-
In the Admin Install dialog, click Continue.
-
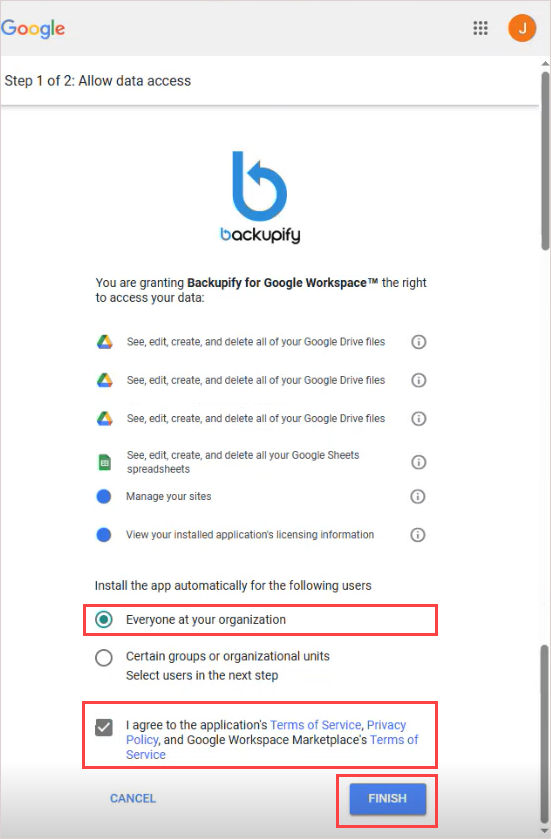
In the Allow Data Access dialog, leave Everyone at your organization selected. Check the Terms of Service agreement box. Click Finish.
-
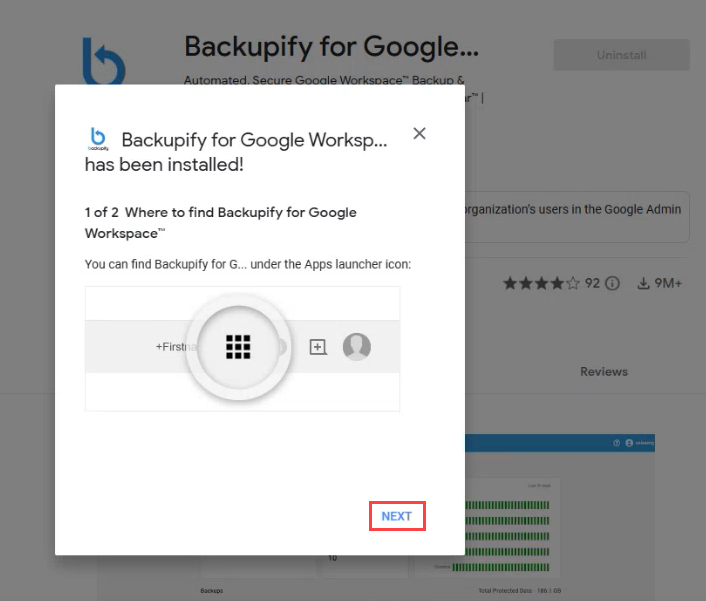
Click Next, then click Done.
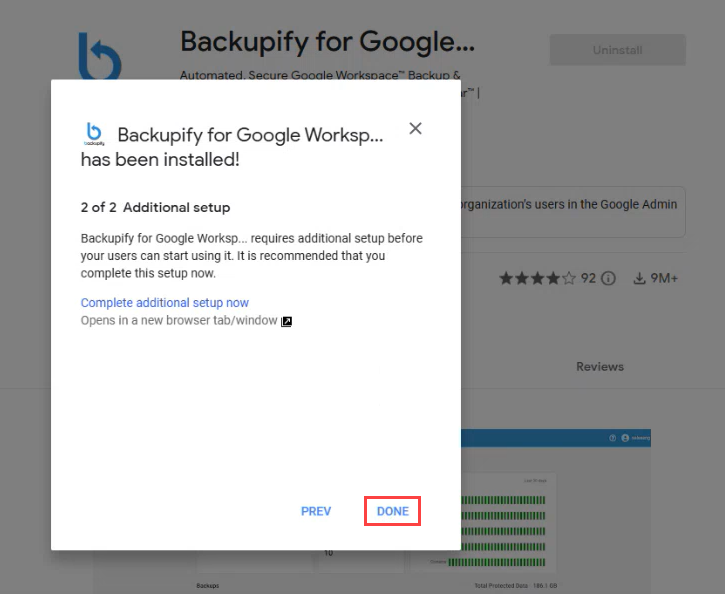
- When finished, the Backupify for Google Workspace app displays in Google Workspace Marketplace as ON in the Domain Installed Apps list. (If you do not see the app in the list, reload the page to refresh the display.)
Create a Backupify account
IMPORTANT You must install the Backupify app following the steps above and then create Backupify login credentials.
To create a new Backupify for Google Workspace account, perform the following steps:
-
Open a private browser tab (e.g., a Google Incognito tab or a Microsoft Edge InPrivate tab).
-
Navigate to the provided URL by your sales representative.
-
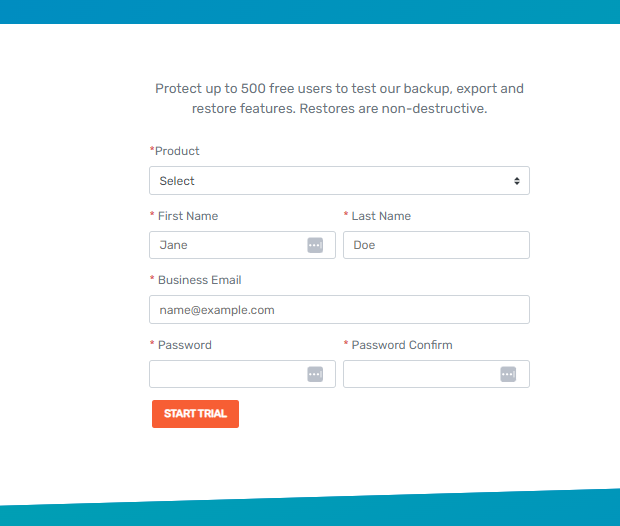
In the Product drop-down box, select Google Workspace.
-
Provide your first name and last name.
-
In the Business Email field, input a Google Workspace super administrator email address.
-
Create a Backupify password.
-
Click Start Trial.
- On the Welcome screen, click Login To Your Trial Account.
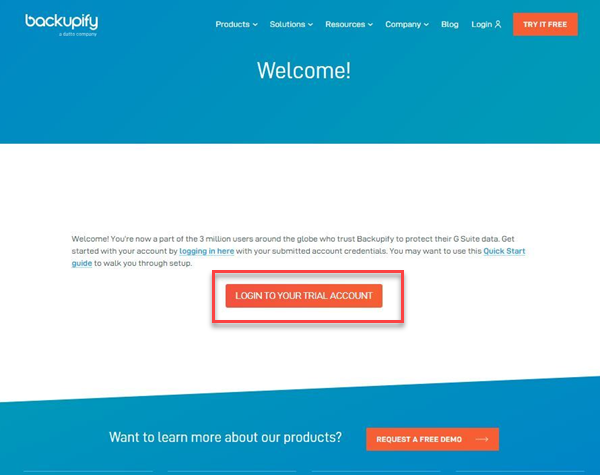
IMPORTANT If the Welcome screen does not appear, contact support for assistance.
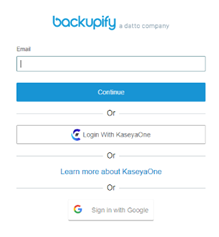
- In the Backupify Login modal, enter your credentials you created above. Do not click Sign in with Google on this attempt. Backupify requires the created credentials to be authenticated before using the Sign in with Google button. Then, click Log In.
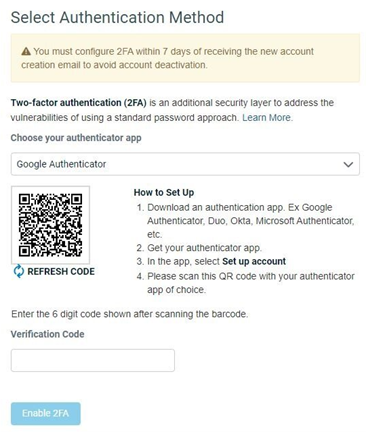
- In the Select Authentication Method modal, follow the instructions to Enable 2FA.
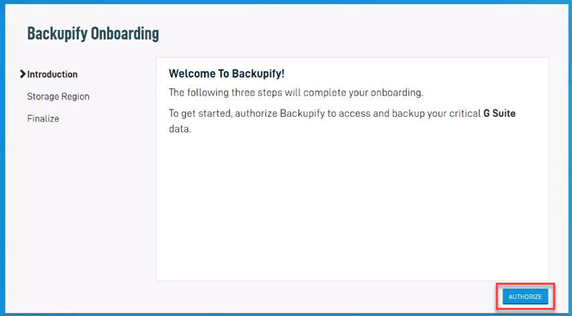
- The Backupify Onboarding wizard will display. Click Authorize.
- Select the appropriate storage region, then click Next to complete the wizard.
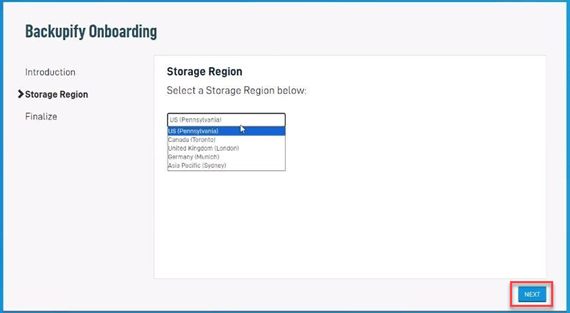
IMPORTANT All data is processed and stored in the region you select. The selected storage region cannot be changed in the future.
-
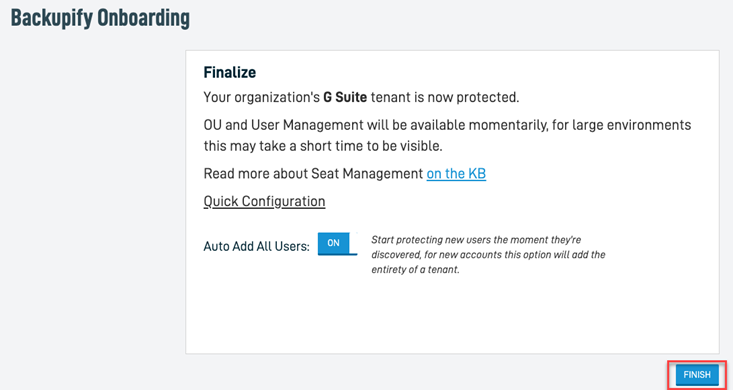
The tenant is now protected. On the Finalize page, Auto-Add All Users is On by default. When Auto-Add All Users is On, each of the organization's end users are immediately added when the account is authorized and created. Any new licensed users added to the organization in the future will automatically be added in Backupify. If you don't want the Auto-Add functionality enabled, click the toggle to turn it off. Click the Finish button.
-
The Backupify dashboard is displayed and if auto-add was enabled in the wizard, backups will begin automatically. If auto-add was disabled in the wizard, you will need to add users manually to initiate backups. See the article Exploring Seat Management features.
-
Once the account has fully provisioned and seats have been added, Backupify will begin its initial ingest. Ingest times will be dependent on the size of the Google Workspace environment.
NOTE Backupify uses the GMT time zone. You cannot configure it for a different region.


