Using the Datto REST API for SaaS Protection
SaaS Protection’s REST API lets vendors create a dynamic integration experience in a more reliable and scalable way. It is also available for MSPs that have an experienced technical background.
Creating an integration with SaaS Protection’s REST API provides an easy way to retrieve readily available backup status and seat data. The SaaS Protection’s REST API uses the industry-standard Swagger UI for an interactive documentation experience that allows developers to trial responses from their own devices on their portal accounts.
Creating an API Key
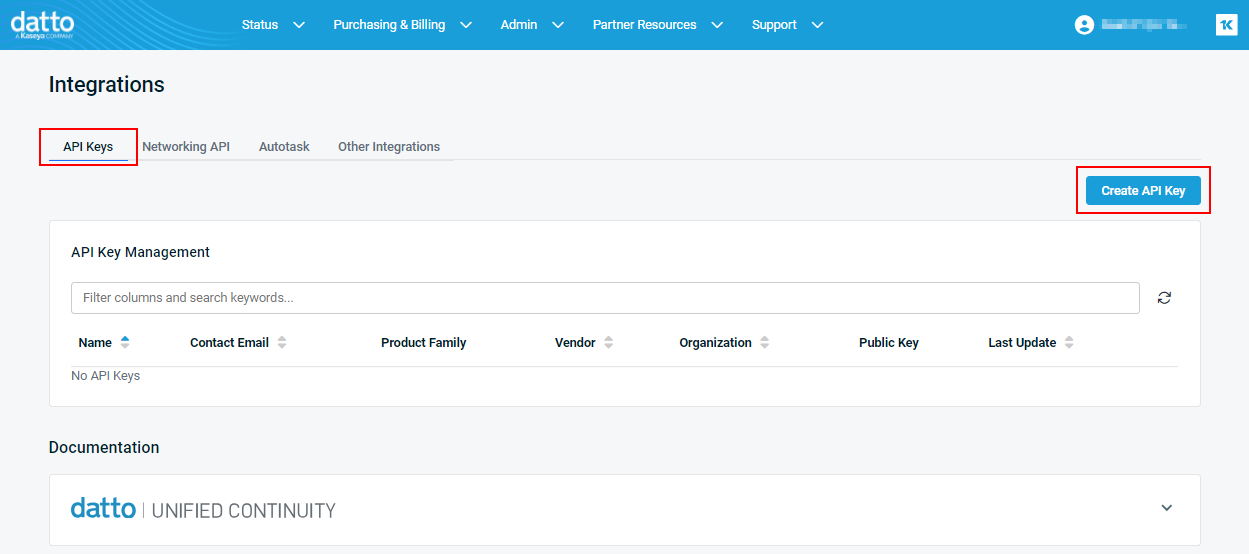
To access the API Configuration options:
- Log into the Datto Partner Portal with your Administrator credentials.
- Select Admin > Integrations.
- On the Integrations page, verify the API Keys tab is selected.
- Click Create API Key.
- In the Create API Key dialog, in the API Key Name box, enter a name.
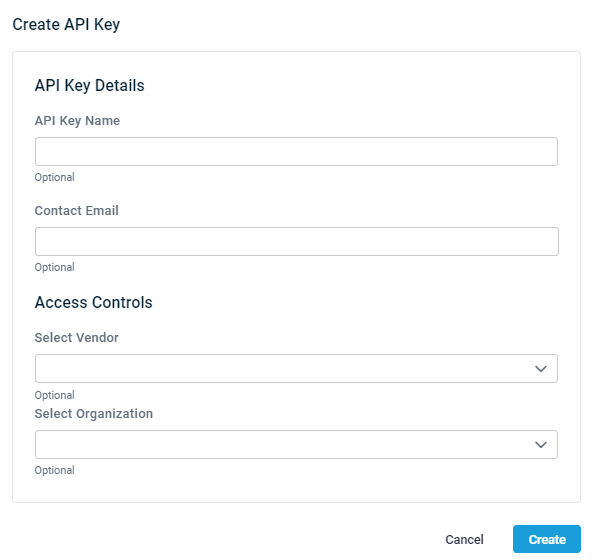
- If applicable, complete the remaining fields and click Create. The API is enabled.
REST API Configuration options
The three-dot menu provides access to configuration options.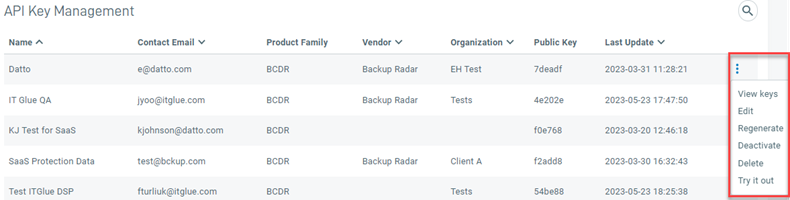
- View keys: Displays public and private key(s).
- Edit: Displays the Edit API screen.
- Regenerate Key: Generates a new public API key.
- Deactivate: Disables the Datto REST API.
- Delete: Deletes the API key.
- Try it out: Populates the REST API documentation with public and private key for testing purposes.
Accessing Datto REST API documentation
Click the Documentation button in the REST API options pane.
The pane will expand and open the API documentation, including basic API options and options for the individual endpoints.
REST API documentation pane options
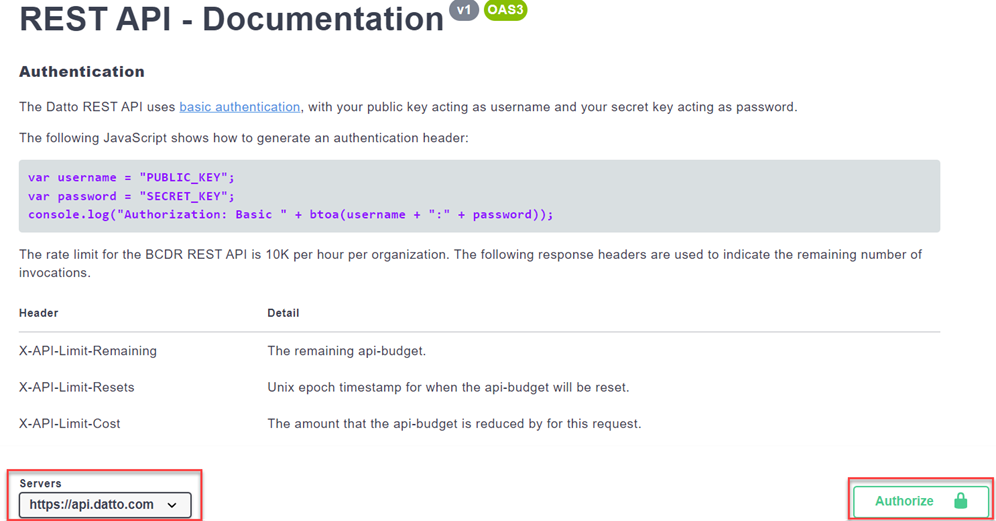
- Authorize: The REST API uses a basic authentication scheme, with an automatically generated public API key/secret API key.
- Servers: This drop-down menu shows what server the API is currently communicating with, and lets you select different available servers.
REST API endpoint options
The REST API documentation provides a menu of all configurable endpoints. Click an endpoint to expand its options.
The endpoint will expand, showing all parameters accepted in the URL, as well as the JSON representation of the responses from the server.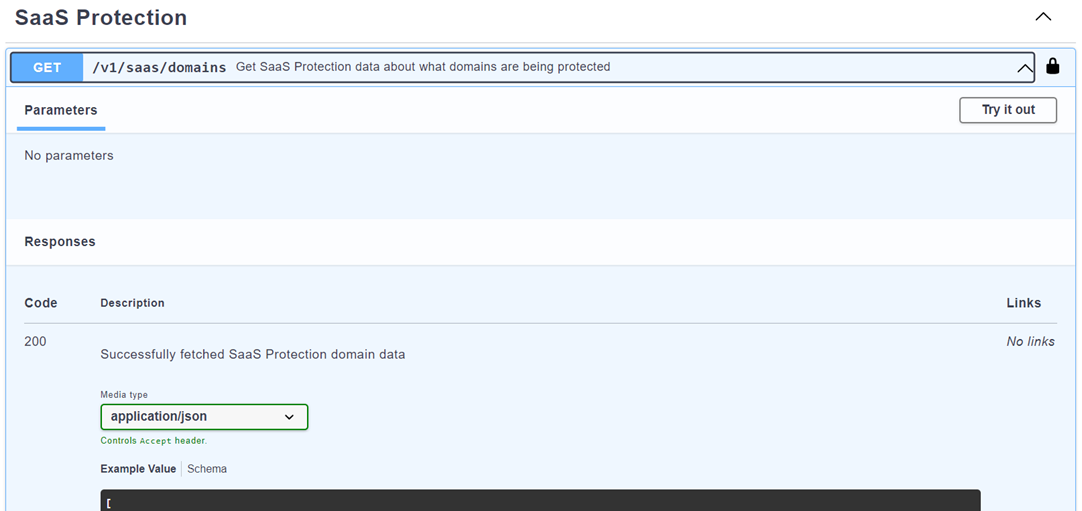
Previewing API call results with the Swagger UI
The Swagger UI lets you change endpoint parameters, run "preview" API calls, and view detailed results of the change at the presentation and code levels.
In this view, you can:
- change each parameter and get a preview of the change's effect.
- see the responses generated by each preview request as a Curl command and URL.
- see the HTTP response codes generated when the server responds to the API call preview.
- download the JSON code block generated by your trial API calls.
A Datto device must be associated with the Partner Portal account for these options to function.
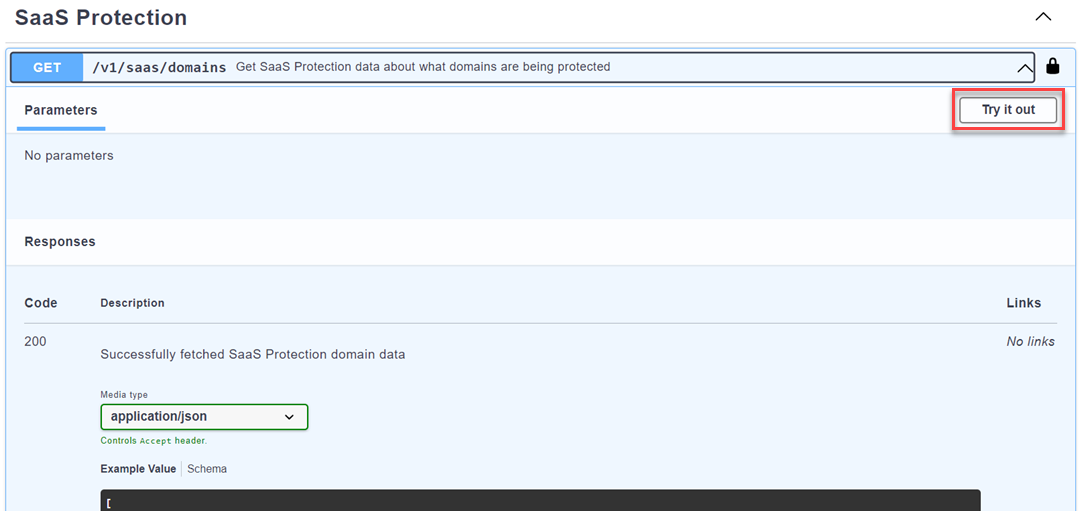
To change parameters and preview an API call:
- Click the Try it out button.
-
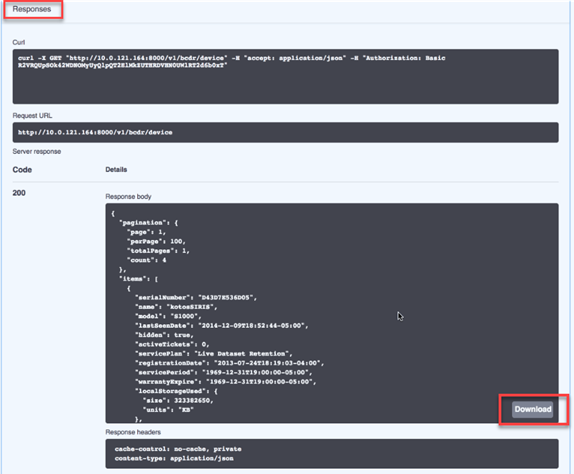
Edit fields will open for each parameter. Make the changes you want, then click the Execute bar to make the new API call.

-
In the Responses pane beneath the Execute bar, you can view the Curl commands, Request URL http code, response headers, and response code block. Click the Download button to download the code block as a JSON file. Click Clear to reset the API preview call.
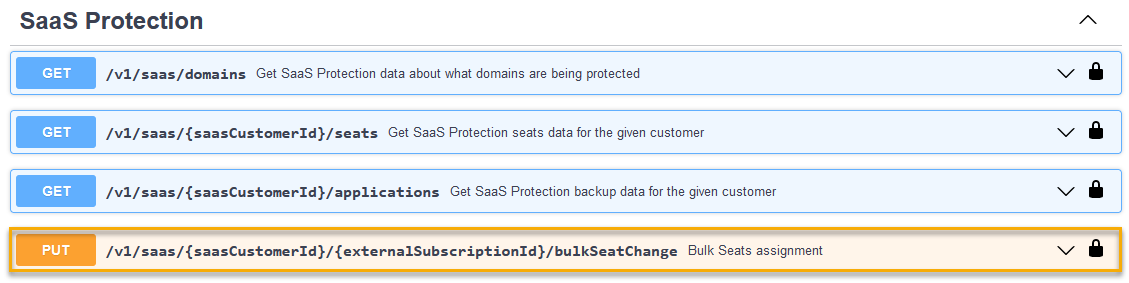
Updating multiple seats with the bulkSeatChange endpoint
You can leverage the bulkSeatChange API endpoint, in combination with the PUT function, to license, unlicense, and pause multiple
IMPORTANT We recommend updating a maximum of 100 seats at a time.
Request syntax
When using this endpoint, the API request must follow the syntax shown below:
EXAMPLE PUT /v1/saas/saasCustomerId/externalSubscriptionId/bulkSeatChange
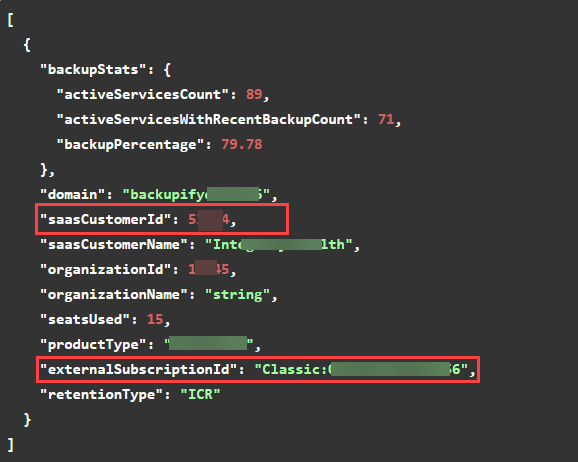
Replace the highlighted placeholders with the actual saasCustomerId and externalSubscriptionId values.
You can obtain the saasCustomerId and externalSubscriptionId from the REST API by using the /v1/saas/domains endpoint with the GET function. Example syntax and output are given here:
EXAMPLE GET /v1/saas/domains
For more on using the REST api, see the REST API Documentation for SaaS Protection on the Datto Integrations API Keys page.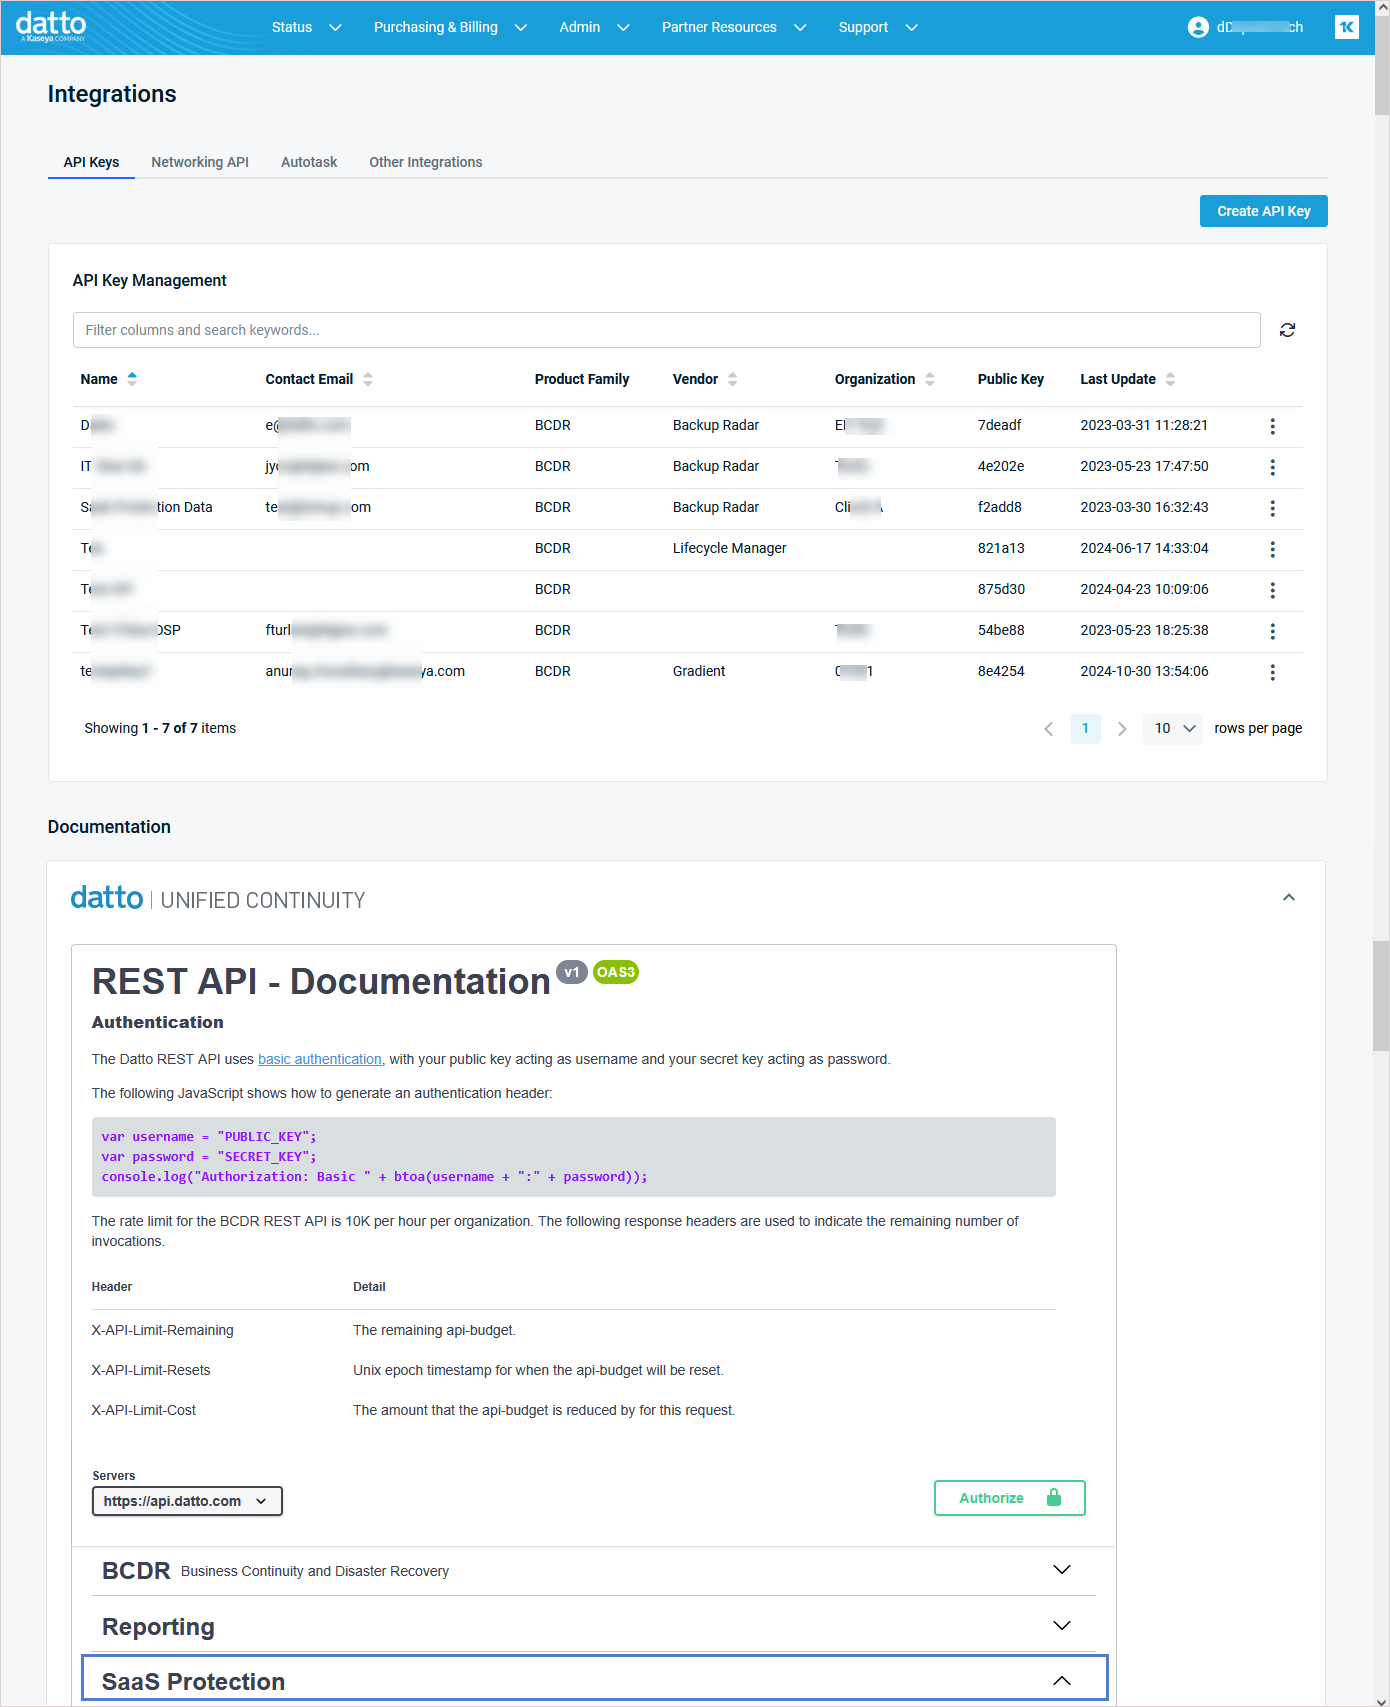
Request payload
The request payload must contain the following values:
-
seat_type: The license type you'd like to use for the seat; case-sensitive
-
Possible values: User, SharedMailbox, Site, TeamSite, Team
-
-
action_type: The action you'd like to take for the license; case-sensitive
-
Possible values: License, Unlicense, Pause
-
-
ids: The object IDs from the live
EXAMPLE “object id”,”object id”
NOTE You can opt to obtain the Ids array from the REST API by using the /v1/saas/{saasCustomerId}/seats endpoint, which will list seats for a given customer and the related remoteId. For details, see the REST API Documentation for SaaS Protection on the Datto Integrations API Keys page.


