Autotask PSA: Integrating the SaaS Protection Daily Backup success report with the PSA REST API using Power Automate
This article discusses how to use the online version of Microsoft Power Automate to integrate the SaaS Protection Daily Backup Success Report with the Autotask PSA REST API.
Environment
-
Autotask PSA
Description
When the Daily Backup Success Report is received in the inbox to which Power Automate flow is applied, the flow will parse the CSV file and generate an Autotask PSA ticket for any applications that have not been backed up in 24 hours. The system will map this ticket to the correct company and queue, as designated by the global variables and integration.
NOTE This solution requires third-party tools.
Requirements
- Datto SaaS Protection + Daily Backup Success Report
- Autotask PSA
- Microsoft Power Automate premium license, a Power Apps premium license, or a Dynamics license
- Encodian Flowr
Assets
This .zip package contains the workflow which you can import into your environment. Follow the instructions below to configure the appropriate global variables.
Preliminary steps
- Download the .zip file above.
- Determine which M365 mailbox you plan to run the flow on.
- Configure your Office 365 Outlook API connection for the appropriate mailbox:
- Log in to Power Automate (external link).
- Select Data from the left-hand menu.
- Select Connections.
- Click + New Connection.
- Search for Office 365 Outlook using the search bar in the top right.
- Click the correct connection.
- Authenticate using the matching M365 account.
- Set up the Daily Backup Success Report to go to this email address.
- Set up a new API user for the flow in your Autotask PSA instance.
- Configure your Encodian Flowr API connection.
- Log in to Power Automate (external link).
- Select Data from the left menu.
- Select Connections.
- Click + New Connection.
- Search for Encodian using the search bar in the top right.
- Click the correct connection.
- Enter your API key from Encodian.
Important considerations
- The name of your organization in Datto SaaS Protection must match the name of the company in your Autotask PSA database exactly, including case and punctuation sensitivity. Otherwise, the flow will return an error message. To correct any discrepancies, you can either:
- Rename your companies in Autotask by following these steps.
- Rename your SaaS Protection domains by contacting Datto Technical Support.
- When you provide the string for your global variables, the case and punctuation sensitivity of the fields is critical.
Importing the flow
- Log in to Power Automate (external link).
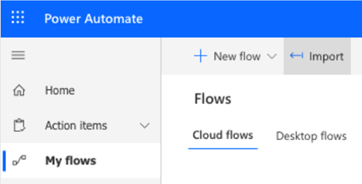
- Select My flows from the left menu, and then Import from the top menu.

- Upload the .zip package downloaded from the Assets section above.
- Review the Related resources package content:
- SaaS Protection: Encodian connection.
- Click the wrench under Actions.
- Select Encodian from the menu.
- Click Save.
- Click Import.
Configuring the flow
- Navigate to My Flows in the left hand menu and click the SaaS Protection Backup Success - for Partners flow to edit. You can rename the flow by hovering over the name in the top left.

- Define your global variables:
PSA webservices zone (example: webservices1): When accessing the web services REST API, you must use the URL zone variation that is consistent with the base URL that you use to access the Autotask PSA website.
PSA API ID: You can find the API ID in the API User’s profile profile that was created for this flow, under the label Tracking Identifier.
PSA UserName: You can find the UserName in the API User’s profile that was created for this flow, under the Credentials header.
PSA Secret: You can find the UserName in the API User’s profile that was created for this flow, under the Credentials header.
Days to add from today for due date of ticket: Enter the number of days in which you would like to set the ticket to be due (example: 4 = 4 days from the date the ticket was created).
Ticket priority to use: Enter a string value that corresponds with your Autotask instance of the ticket priority you want to assign (example: High, Medium, Low, Critical). Ensure there are no spaces at the end of the string or typing errors.
Ticket queues to use: Enter a string value that corresponds with your Autotask instance of the ticket queue you want to assign (example: Level I Support, Level II Support). Ensure there are no spaces at the end of the string or typing errors.
Ticket source to use: Enter a string value that corresponds with your Autotask instance of the ticket source you want to assign (example: Monitoring Alert, Email, Phone). Ensure there are no spaces at the end of the string or typing errors.
Ticket category to use: Enter a string value that corresponds with your Autotask instance of the ticket category you want to assign (example: Standard, Datto Alert, Support). Ensure there are no spaces at the end of the string or typing errors. To verify the options available in your Autotask PSA database, see Admin → Features & Settings→ Service Desk.
-
Save your flow and check for any errors that need to be resolved. You can run a test by forwarding a copy of the Daily Backup Success Report to the email inbox on which you set up this flow. You must remove the “Fwd:” from the subject line.


