Managing user seats with group-level auto add
Group-level auto add enables you to automatically add Microsoft 365 (Entra ID) groups and their users to SaaS Backup protection. This ensures that any new user added to a group is automatically protected, streamlining your backup management process.
You can manage group settings directly from the User & Group Management > View Groups tab in SaaS Protection, enabling or disabling auto-add for new and existing groups with just a few clicks. See these topics for details:
- On the SaaS Protection Status page, click the desired organization.
- From the Seat Management menu, select Users.
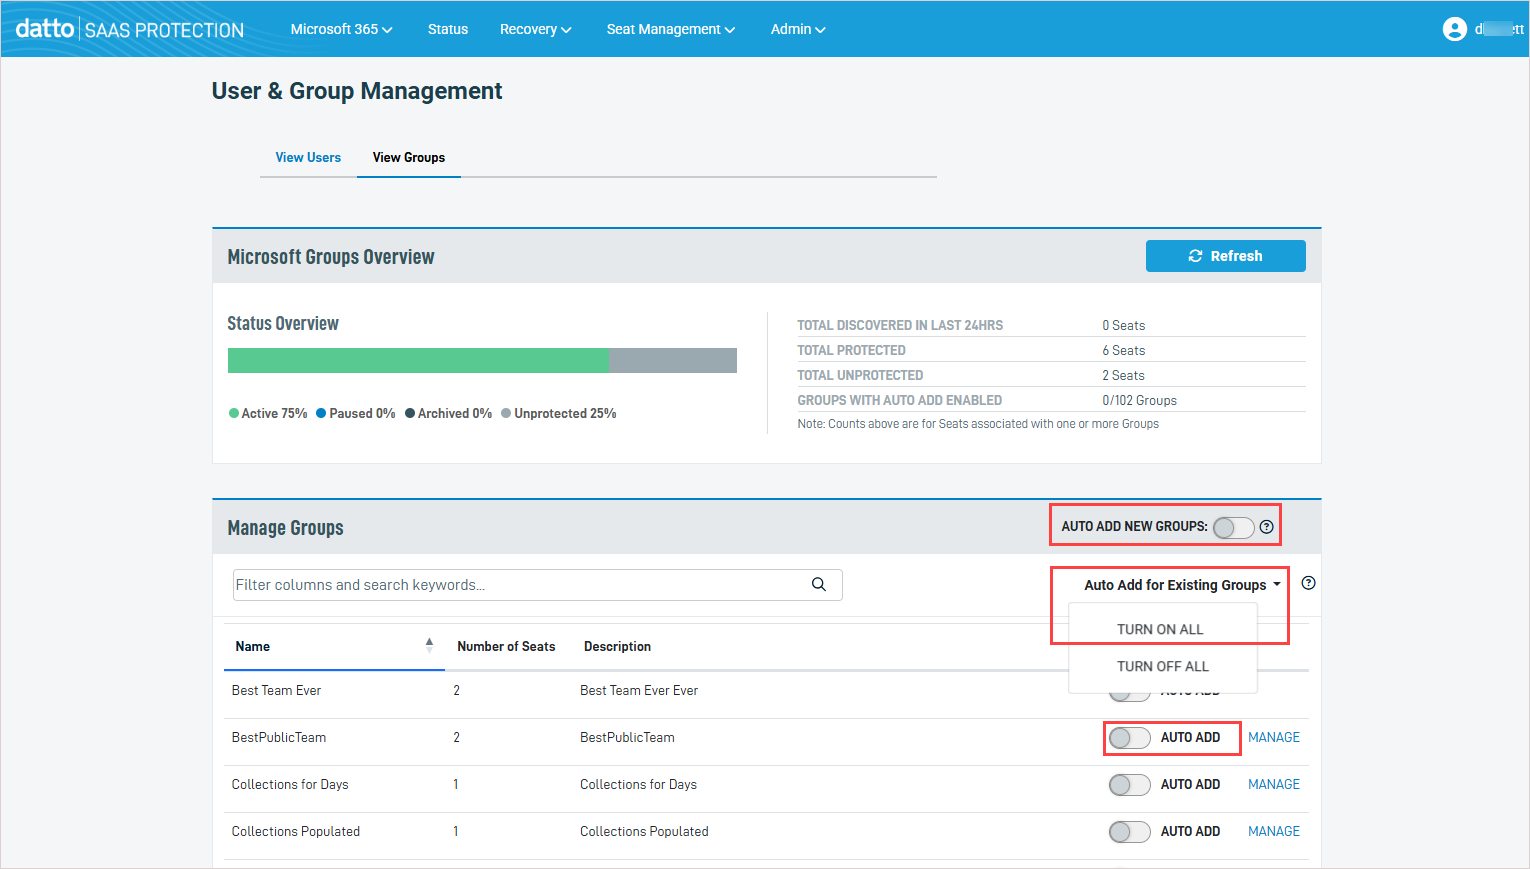
- On the User & Group Management page, click the View Groups tab.
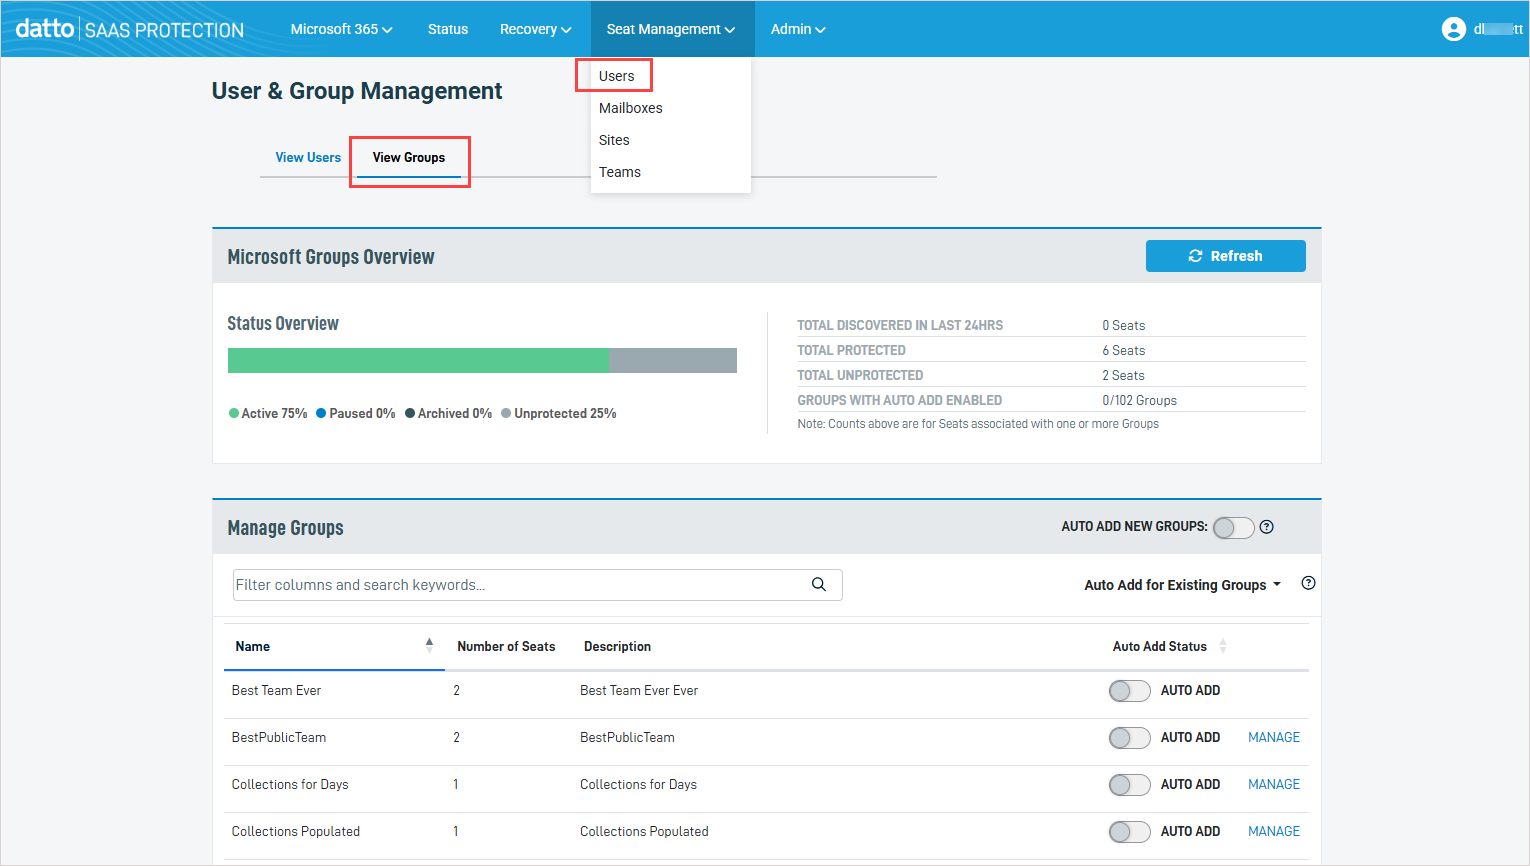
- The View Groups tab displays all Microsoft groups retrieved from Entra ID.
NOTE SaaS Protection retrieves updated group information from Entra ID once per day. To manually check for updates, click the Refresh button.
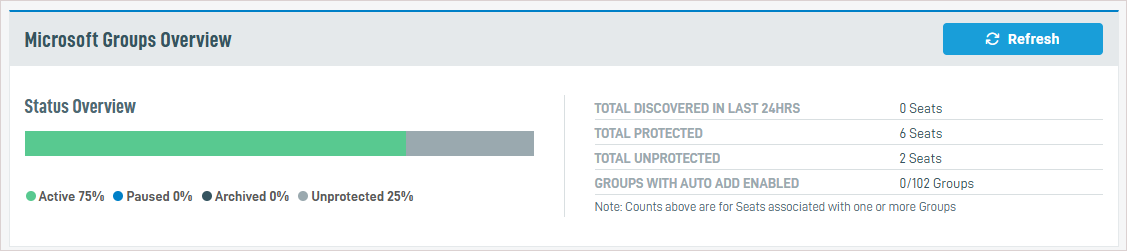
The Microsoft Groups Overview section has a Status Overview bar showing what percentage of groups are Active (protected), Paused, Archived, and Unprotected, and a table with the following information:
- Total Discovered in Last 24 Hours: Total number of new seats that were added to groups within the last 24 hours.
- Total Protected: Total number of protected seats across all groups.
- Total Unprotected: Total number of unprotected seats across all groups.
- Groups with Auto Add Enabled: The number of groups with auto add enabled / the total number of groups.
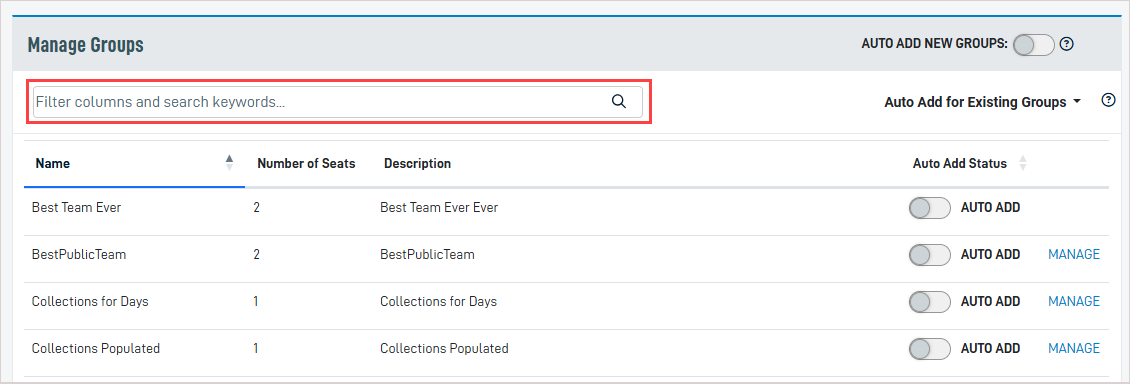
The Manage Groups section displays all Microsoft groups, along with the following details: group name, number of seats, description, and auto add status. To filter the groups that display, enter text in the Filter columns and search keywords field.
NOTE From the Manage Groups section you can also enable auto add and manage a group's protection settings. For details, see To enable group-level auto add and To manage a group's protection settings.
Group-level auto add automatically adds groups and their users to backup protection. You can enable auto add globally (for all newly created groups or all existing groups) or by group (to auto add SaaS Protection to users in certain groups only).
- Group-level auto add is not supported for Entra ID dynamic distribution groups.
- Group-level auto add is only supported for Entra ID on-premise groups that are synchronized to Entra ID. Purely local groups that are not synced cannot be added to SaaS Protection.
- Group-level auto add is supported for these other Entra ID group types: M365 groups, security groups, and cloud groups.
- On the SaaS Protection Status page, click the desired organization.
- From the Seat Management menu, select Users.
- On the User & Group Management page, click the View Groups tab.
- In the Manage Groups section, enable the applicable Auto Add feature:
NOTES
- SaaS Protection retrieves updated group information from Entra ID once per day. To manually check for updates before you enable auto add, click the Refresh button in the Microsoft Groups Overview section above.
- Group-level auto add protects newly discovered seats only. You can opt to add protection to existing seats that have been added to the group as described in step 5 below.
- Auto Add New Groups: Turn on this toggle to enable auto add for all newly discovered groups. This does not affect the auto add setting of existing groups.
- Auto Add for Existing Groups: Click this dropdown and select Turn On All to enable auto add for all existing groups. This does not affect the auto add setting of newly discovered groups.
- Auto Add: To enable auto add for a particular group, turn on its Auto Add toggle.
-
Once you've enabled auto add for a group, any newly discovered seats that have been added to the group are automatically protected.
(Optional) To add protection to any existing seats that have been added to the group, use the To manage a group's protection settings procedure to protect all users in the group.
NOTE SaaS Protection retrieves updated group information from Entra ID once per day. To manually check for recently added groups, click the Refresh button in the Microsoft Groups Overview section above.
- On the SaaS Protection Status page, click the desired organization.
- From the Seat Management menu, select Users.
- On the User & Group Management page, click the View Groups tab.
- In the Manage Groups section, locate the group whose settings you will manage. (You can filter the groups that display by entering text in the Filter columns and search keywords field.)
- Click the group's Manage link.
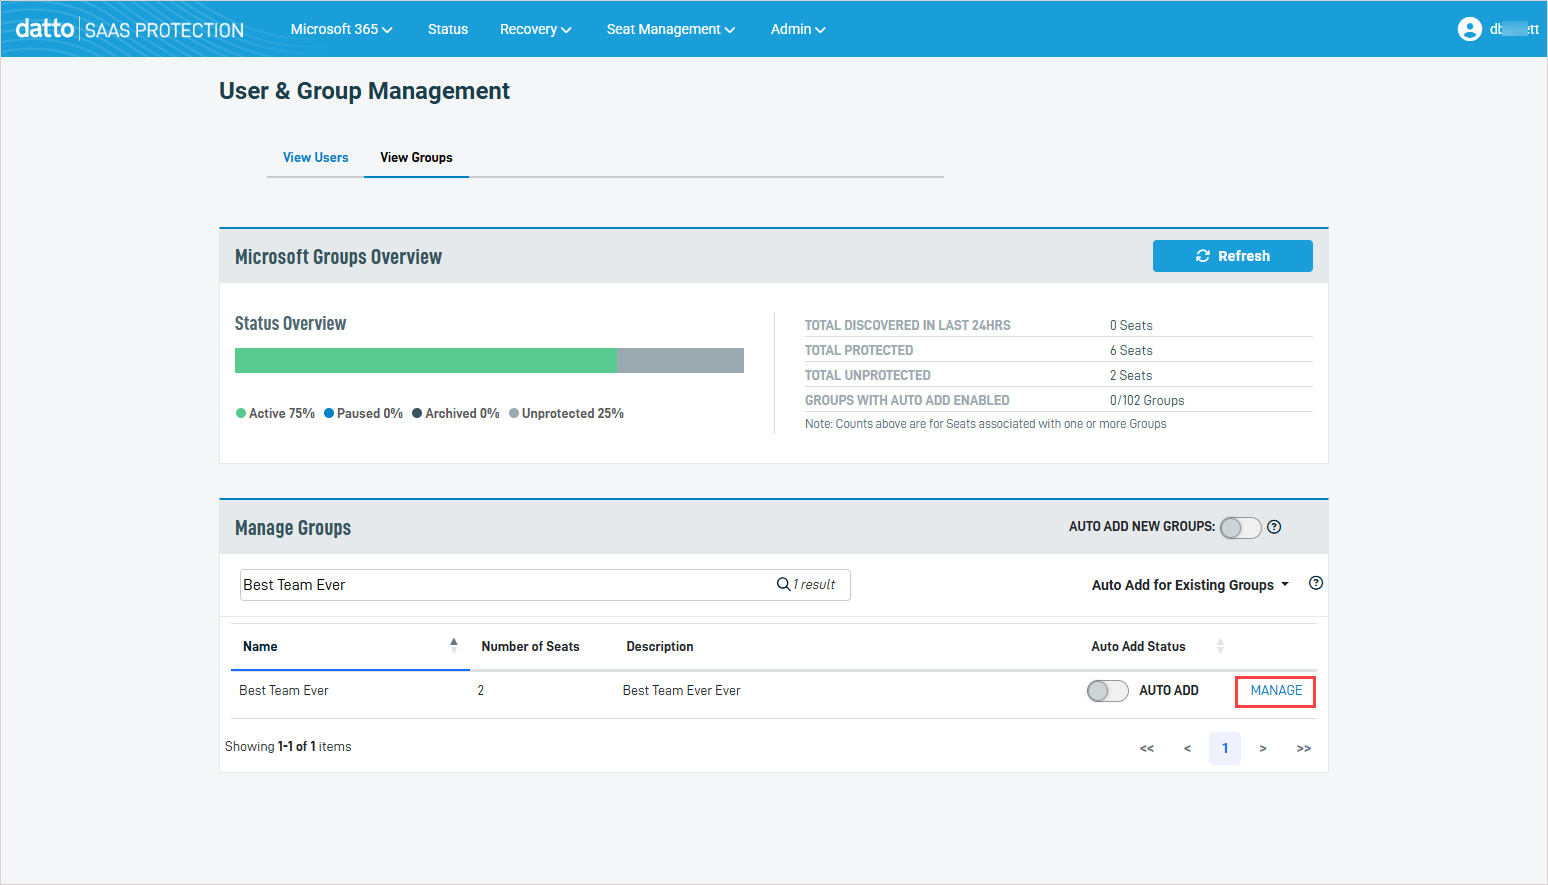
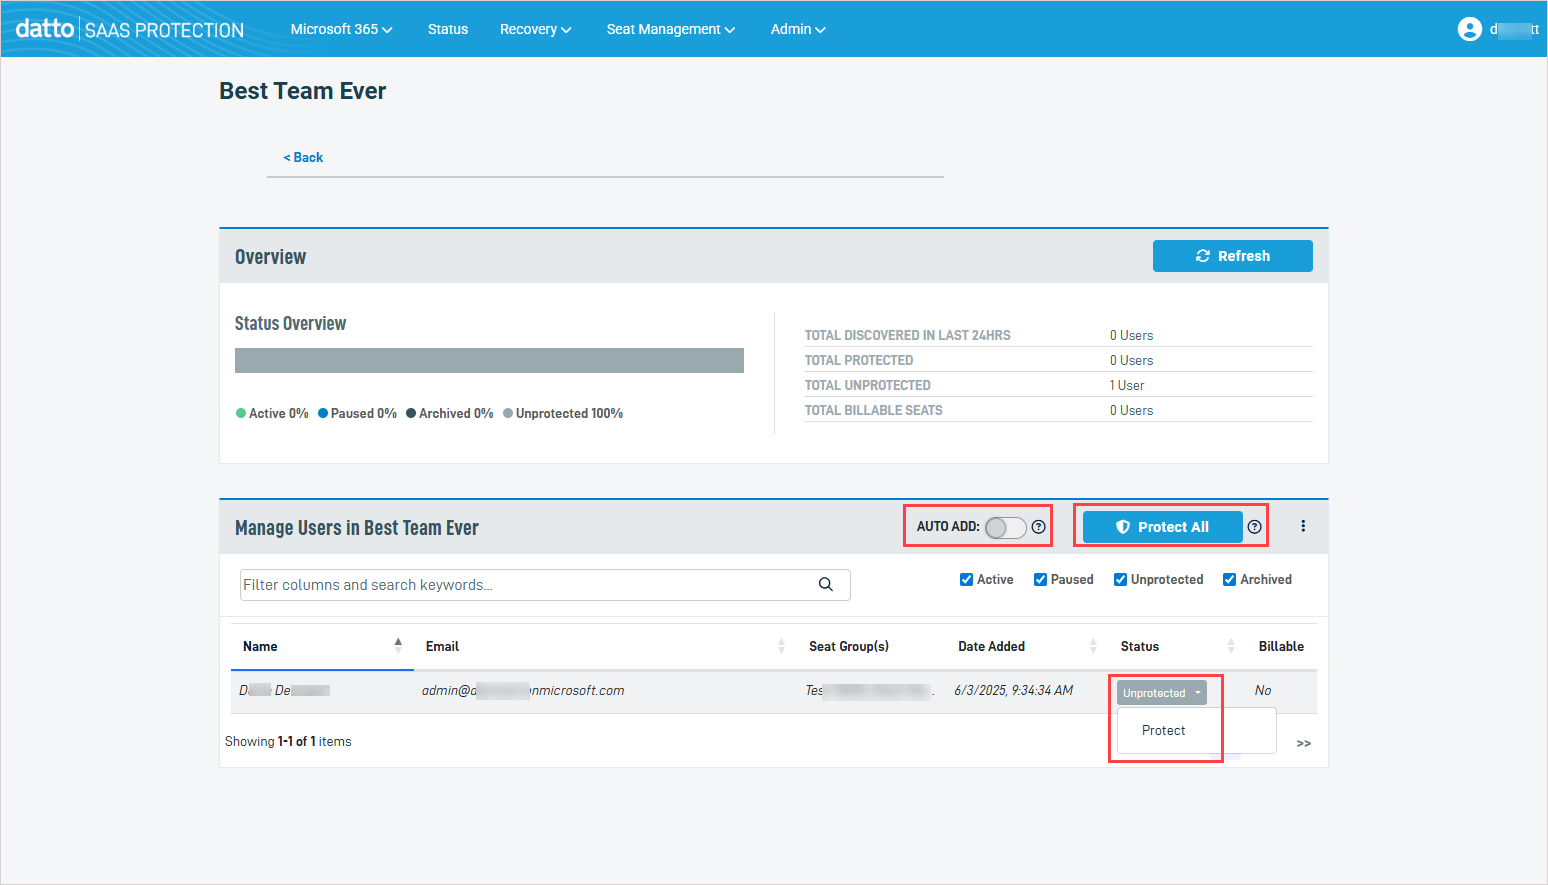
- Details about the selected group display on the GroupName page. In the Manage Users in GroupName section, modify any of the following settings:
- Auto Add: Turn on the toggle to enable auto add for the group. Turn off the toggle to disable auto add for the group.
- Protect All / Unprotect All: Click to protect or unprotect all users in the group. This changes each user's status to Protected or Unprotected.
- Status: To manage protection at the user level, click the value in the user's Status column and select another status from the list. For more on changing a seat's status, see the article Changing seat status.